Mastering Astrophotography: Enhancing Stars and Nebulae
Astrophotography is not just about capturing images of the cosmos; it’s also an artistic endeavor that involves meticulous processing to unveil the splendor hidden within those dark skies. Whether you’re gazing at the serene sparkle of stars or the radiant cloud-like formations of nebulae, transforming your raw images into breathtaking astrophotography requires careful editing and enhancement. This comprehensive guide is tailored for amateur astronomers and photography enthusiasts looking to elevate their astrophotography through the digital darkroom and discover the awe-inspiring beauty that astronomy photographs can possess.
Understanding the Basics of Astrophotography Image Processing
Astrophotography is the art of capturing celestial objects and the night sky. The process starts with taking long-exposure photographs using specialized equipment, including telescopes and tracking mounts. While the initial photo is a marvel in itself, refining it through image processing significantly boosts its impact. This phase is critical for revealing more stars, enhancing their colors, and bringing out the intricate details of nebulae.
But first, a quick primer on the terminologies:
- Stars: Spherical celestial bodies that emit light due to nuclear reactions at their cores. In photography, they often appear as bright points of light, with some exhibiting unique colors and features.
- Nebulae: Clouds in the interstellar space, constituting of dust, hydrogen, helium, and other ionized gases. Nebulae are often expansive formations that may include regions of active star formation.
- Image Enhancement Techniques: These include processes like contrast adjustments, color balancing, and sharpening, aimed at improving the visual quality of the image.
With these foundations set, your journey towards enriching the celestial snapshots begins with understanding the fundamentals and moving on to sophisticated techniques.
Enhancing Stars in Your Astrophotography Images
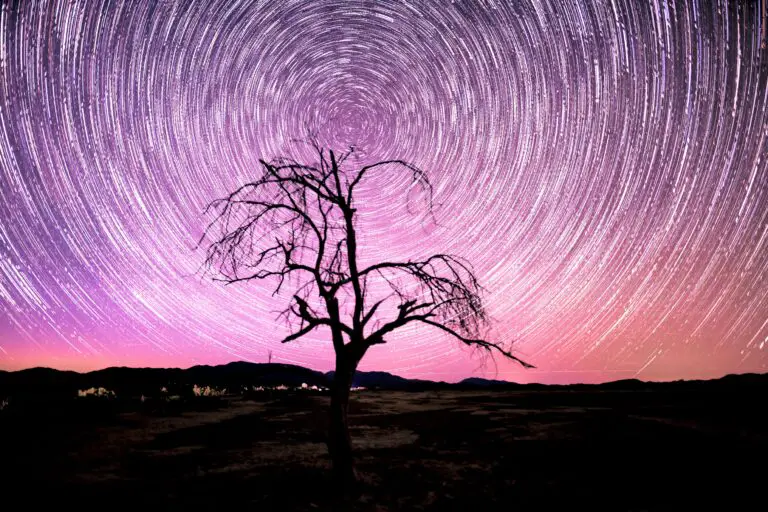
The ethereal beauty of the cosmos is often punctuated by the infinite shimmer of stars. Enhancing these stellar points goes beyond mere brightness adjustments. It’s about preserving their inherent qualities while also adding depth and vibrance.
Adjusting Brightness and Contrast
Your first step in star enhancement is achieving the right balance of brightness and contrast. Overexposed stars can lose their fine details, while underexposed ones may not stand out.
- Highlights and Shadows: Use slider adjustments in your software to fine-tune the brightness of the stars without compromising the detail in the surrounding regions or creating overly harsh shadows.
- Contrast Enhancements: Increase contrast to make stars pop against the dark sky, but do so selectively to avoid creating unnatural glare in the image.
Enhancing Star Colors and Details
The color diversity of stars is a visual delight that can be further emphasized through processing.
- Color Balancing: Use the white balance tools to correct any color cast and enhance the true colors of the stars. With some stars, you can even intensify their hues to create compelling points of interest.
- Sharpening: Apply a subtle amount of sharpening to accentuate the boundaries and features of individual stars without causing a grainy look.
Removing Noise and Artifacts
Noise and artifacts can detract from the clarity of your star fields. Strategies to minimize these include:
- Noise Reduction: Apply noise reduction tools carefully to maintain the fine details of faint stars while eliminating unwanted grain.
- Masking: Use masking techniques to target noise reduction only in the background, leaving the stars unaltered.
- Cloning and Healing: For isolated hot pixels or other blemishes, the cloning and healing tools can be your saviors. Use them sparingly to avoid a repetitive appearance in your image.
Enhancing Nebulae for Maximum Impact
The grandeur of nebulae lies in their expanse and complexity. To truly showcase their beauty, they require meticulous processing that brings out their intricate structures and, for some, stunning colors.
Increasing Nebula Contrast
Nebulae often have subtle shades of color and brightness that, when amplified, can reveal their full glory.
- Local Contrast Enhancement: Target local contrast to highlight the nebula’s texture without affecting the overall brightness. This brings out fine details and can make the nebula look three-dimensional.
- Dodging and Burning: Use these techniques to selectively brighten (dodge) and darken (burn) areas of the nebula to create a more dynamic and engaging image.
Color Enhancement for Nebulae
The nebulae’s colors can tell stories of their composition and condition. Bringing these hues to the forefront can impart a visual narrative to your image.
- Saturation Adjustment: Increase the saturation of nebulae to enhance their colors, but be mindful not to oversaturate, which can lead to unnatural and garish tones.
- Selective Color Tools: Some software offers tools to focus on specific color ranges within the nebula, allowing for a more controlled and nuanced color adjustment.
Sharpening Nebula Details
The delicate tendrils and filaments within a nebula call for selective sharpening to ensure they remain crisp without becoming over-processed.
- High-Pass Filter: A high-pass filter applied to the nebula can sharpen without affecting the background, maintaining the balance of the image.
- Unsharp Mask: A tool commonly used in astrophotography to sharpen specific areas, the unsharp mask requires delicate usage to avoid introducing noise or artifacts.
Tools and Software for Astrophotography Image Processing
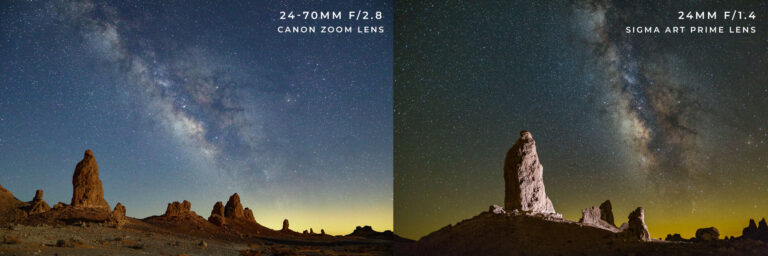
The choice of tools and software is pivotal in your astrophotography processing workflow. While there are several options available, some are tailored to the specific needs of astro-imagers.
Popular Software for Astrophotography Image Processing
- Adobe Photoshop: A versatile tool with a wide array of features suitable for astrophotography. Its layer-based system allows for non-destructive editing.
- PixInsight: Geared explicitly towards astronomical imaging, PixInsight provides a comprehensive suite of tools designed for the unique requirements of astrophotography.
- DeepSkyStacker: An excellent choice for those stepping into astrophotography processing, DeepSkyStacker specializes in stacking and aligning images to reduce noise and enhance detail.
Tips for Beginners on Choosing the Right Tools
- Consider the learning curve: Some software can be complex, so choose a tool that matches your current skill level and allows for growth.
- Compatibility with astrophotography formats and industry standards should be a primary consideration.
- Community and support: The availability of tutorials and a community of users can significantly aid in your learning and troubleshooting processes.
Practical Tips and Tricks for Processing Astrophotography Images
Astrophotography image processing can be intricate, but with these practical tips and tricks, you’ll be well on your way to crafting stunning celestial portraits.
Best Practices for Processing
- Work with non-destructive editing techniques whenever possible. This allows you to make adjustments without altering the original image data.
- Use layer masks to apply adjustments selectively, ensuring that your changes only affect the areas you intend to enhance.
- Save your progress regularly in different stages, giving you the flexibility to backtrack or compare different versions of your edit.
Common Mistakes to Avoid
- Over-processing: It’s easy to fall into the trap of applying too many adjustments. Always err on the side of subtlety, especially in astrophotography where the objective is often to portray the sky as it appeared to the eye.
- Neglecting to calibrate your monitor can lead to inaccurate color representation, impacting your final edit.
- Not using the power of image stacking to reduce noise and improve the signal-to-noise ratio in your final image. Stacking multiple frames allows you to collect more light and detail from your deep-sky targets.
Conclusion: Your Astrophotography Journey Continues
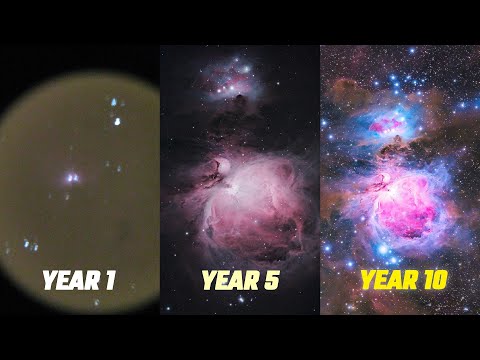
This insight into the art of astrophotography image processing is just the beginning of your exploration. As you continue to learn and push the boundaries of your craft, each image will stand as a testament to your passion and dedication. Remember, the joy of astrophotography lies not only in the capture but in the process of revealing the mysteries and majesty of the universe through your lens. With each new technique mastered, you bring the cosmos a little closer to Earth.
Equip yourself with knowledge, practice with patience, and never shy away from experimenting with new skills and tools. Your astrophotography gallery could soon become a cosmic tapestry that not only stirs the imagination but beckons others to join you on this incredible voyage through the stars.